It cannot be said that many people are engaged in breeding rabbits on their plots or in village farms, and every year their small number decreases even more. And yet, with the right approach, such an activity can generate income and provide owners with healthy and tasty meat.
The main condition for keeping rabbits is properly made cages in which the animals will feel as comfortable as possible. How to make them, and what materials are required for this?
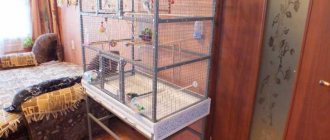
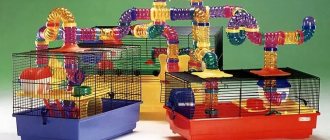
DIY rabbit cages, all sizes and drawings
Recommendations for placing a rabbitry
It is important not only to understand how to make a rabbit cage, but also to know where to place it. When choosing a place on the street where the rabbitry will be installed, you need to consider several important factors:
- Rabbits are distinguished by increased sensitivity to drafts. Therefore, the place should be chosen such that the rabbit’s house is out of reach of the winds.
- However, greenhouse conditions are not suitable either. An important point in keeping any pets, including rabbits, is high-quality ventilation. If this condition is not met, pathogenic organisms in the feces will begin to actively multiply and negatively affect the condition of the rabbits.
- The location should be dry, away from bodies of water. This is due to the fact that the upper limit of moisture tolerated by these animals is 75%. An indicator higher is fraught with consequences - pets will begin to sneeze and get sick.
- Homemade rabbit cages should be installed in the shade under trees. Avoid direct exposure to sunlight.
- During the winter cold, the rabbit's house is insulated. The temperature inside the cells must be maintained constant. It is not allowed to decrease below +10 degrees. The upper temperature is +20 degrees.
The rabbitry is installed in the shade, direct sunlight is excluded Source fermok.ru
Cold climatic conditions require the location of the rabbitry in a special barn or other building. Which also has a number of specific requirements.
- The windows of the shed should face south or southeast. This way the animals will be able to receive enough light and warming sunlight.
- It is important that additional lamps and heaters are installed in the room so that in winter the animals avoid a lack of heat and light.
- The walls must be plastered. This will prevent excess moisture from penetrating into the room itself.
- A constant supply of air is ensured to the cells.
When arranging the cells, it is necessary to take into account that they must be located from the ground at a certain height. This saves you from rodent attacks.
Optimal location for cells
Animals in cages should not be exposed to harmful environmental influences. Otherwise, they will not be able to grow normally and may get sick or die. Therefore, it is necessary to comply with simple requirements:
- Rabbits are protected from drafts. Gusts of wind in the area of 20-30 m/s are not allowed, since animals can get sick, and mass death of livestock is possible. They react sensitively to the movement of cold air currents. In nature they hide in a hole;
- In conditions of elevated temperature and humidified air, the risk of pathogen proliferation increases, which is facilitated by proximity to feces. Therefore, it is necessary to regularly clean the cages and provide access to clean air saturated with oxygen;
- In winter, high-quality bedding is created, walls are insulated, and heating is used. The temperature is kept around 10 - 20 degrees Celsius.
Tip: Particular attention is paid to pregnant females and cubs as they are more vulnerable to extreme environmental conditions. Cages with them are insulated by all available means.
Therefore, in order to take into account all the nuances, it is beneficial to create high-quality cages for rabbits with your own hands. They are optimally suited for comfortable living of animals in the local climate based on the nuances of the selected area for breeding.
What materials will you need?
When planning to make a cage for rabbits, you should prepare certain tools and materials. Wood and metal mesh are the priority. The first of these materials requires mandatory treatment with antiseptics.
Tools and materials for building a rabbitry Source kartoska.ru
Materials:
- edged board;
- wooden blocks;
- plywood;
- mesh with small cells;
- medium diameter metal wire;
- plastic pallets.
Important! It is unacceptable to use chipboard instead of plywood, because the latter is characterized by high moisture absorption, as a result of which it quickly becomes unusable.
Tools:
- hacksaw;
- screwdriver;
- hammer;
- pliers;
- plane;
- corner.
The roof of the cage is covered with slate.
Materials and tools
For the most part, these designs are made handicraft, using scrap materials and tools.
Important: it is not advisable to use synthetic materials for the production of rabbit hutches. Optimal construction is made of wood, clay, adobe, brick, metal. Fiberboard and particle boards can harm the health of animals.
Exceptions are pallets for waste collection that are inaccessible to animals and thick plastic film covering the barred doors from the outside to protect them from the cold.
As an example, let’s look at the necessary list of materials and tools based on the wooden structure of a large rabbit cage:
- timber 40x40 or 50x50 mm for the base - (two lengths plus two widths) x two for a single-tier cage and four x for a two-tier cage, shown in the photo above. A similar beam for vertical posts and braces. There must be at least six racks (eight in the photo), at least four braces;
- thin timber or planks (20x10, 10x10 mm) for the bottom. The quantity is approximately calculated based on the bottom area, taking into account the gap between the elements of at least half their width. Instead of planks, you can use plywood;
- metal mesh with cells no less than 2x2 cm;
- slate or tiles (ondulin, roofing felt for flooring) for constructing a canopy. Metal tiles or sheets should not be used - when heated, rabbits will suffer heatstroke;
- corners and plates for connecting parts;
- curtains and hinges for doors;
- perforated corner (plaster) for fastening along the internal contour. This is necessary to prevent rabbits from chewing on the wood;
- wood screws for assembly, nails and staples for fastenings.
The tools you will need are a hand or electric saw, a screwdriver, and a drill for drilling (so that the wood does not crack when tightening the screws). You may also need sandpaper to clean up the cut areas.
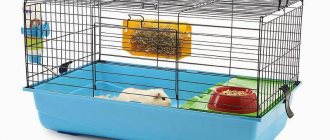
Cage sizes for rabbits, drawings
The size of rabbit cages depends on the breed of pet. Larger individuals, therefore, need more space. Standard building dimensions:
- cage height for rabbits – 50-70 cm;
- width – 70-80 cm;
- length – 120-170 cm.
Important! If there is a need to change the size of the building, then the length indicator increases. The height and width are not touched, they are standard.
The roof of the rabbitry can be sloped backwards. Then the height of the rear part will have to be reduced by 5-10 cm.
Roof of a rabbitry with a slope Source sait-pro-dachu.ru
See also: Catalog of companies that specialize in the design and installation of small architectural forms
Only individuals of the same sex can be located in one pen. Mixing animals of different sexes is prohibited due to certain circumstances. In particular, the following:
- high probability of uncontrolled cases;
- Pregnancy in females will be difficult to track;
- there is a high risk of males fighting for the attention of females and vice versa;
- warring females can kill each other's offspring.
It is wise to start by drawing up a drawing of the planned building. According to the proposed drawing, you can build wooden cages for rabbits. The proposed rabbitry solution is the most popular, ideal for keeping small livestock. In the constructed cage you can equip a house for a decorative rabbit.
Creating a two-tier structure will require more effort, patience and skills, but this model is very convenient, as it allows you to use less space while accommodating a large number of animals.
When choosing a drawing for a future building, you should take into account the possibility of placing a rabbit house in a cage in the future.
Dimensions of the rabbitry Source skachat-kartinki.ru
Nursery construction
The first thing you should pay attention to when making nurseries is the design. The parameters and quality of the final construction will depend on the chosen design.
Nursery construction
There are several types of rabbit hutches:
- single-tier;
- two-tier;
- three-tier;
- multi-tiered;
- monolithic;
- portable;
- shads;
- nurseries in Zolotukhin, Tsvetkov, Rabbitax.
Nurseries differ in materials (wood, plywood, metal profiles) and the breed of pets. In the latter case, rabbitries are allocated for female rabbits and rabbits, for decorative breeds, dwarfs, etc.
Nurseries are designed for warm and cold seasons; for this purpose, special seals are installed in them, and the buildings are closed from precipitation.
Single-tier rabbit cage, first steps - frame
If you have a drawing and the desire to build cages for breeding rabbits, it will not be at all difficult.
First, a frame is formed:
- Wooden beams are prepared in advance and treated with an antiseptic composition in order to subsequently avoid rotting of the material and the appearance of harmful microorganisms in it.
- The timber is used to assemble the frame of the future cage. 4 beams of 1.5 meters each, 4 – 55 cm and 4 – 70 cm are cut from the workpiece. You can replace 4 beams of 55 cm with 2 beams of 55 cm and 2 beams of 35 cm. Smaller pieces will work on the back wall, where the queen's nest will subsequently be identified.
- Short bars are connected to one and a half meter bars. The result is two equal figures. From the same bars for the front and back of the cage you will get a rectangle. If two different pairs were initially taken, we get a trapezoid.
- Using 70 cm blanks, these two rectangles must be connected to each other.
The result is a frame in the form of a large box.
Making cages from mesh
These are very simple and cheap designs - all elements are made of metal mesh. The cages are easy to move indoors in winter and outdoors in summer. You can place it directly on the ground, which makes caring for animals much easier.
Frameless cage is an excellent option for rabbits for the summer season
To work, you will need wire cutters or a grinder to cut the mesh. This is one of the few cases when we recommend cutting galvanized mesh with a grinder. Why? The fact is that with this tool you can completely grind off small pieces of wire, and in some areas of the cage the cut should be perfectly smooth. Otherwise, rabbits may be injured, which is very undesirable. You need ordinary pliers and a clipper for crimping metal staples. If it is not there, then you can only get by with pliers, but the manufacturing process will become much more complicated, and the appearance will deteriorate.
What is a clipper
Step 1 . Make the bottom. For this element, you can use a mesh with cell sizes of 16x48 mm; such cell parameters ensure good manure drainage, the floor is always clean and dry. Rabbit breeders know that wet floors make rabbits sick and lose weight. In our case, the cells are two meters long, 90 cm wide, and there are four cells of 50 cm each in one row. Cut the mesh to the appropriate size, the number of parts depends on the number of sections.
Cut out a blank for the bottom from the mesh
Practical advice. If this technology is unfamiliar to you, then make blanks for only one section. After gaining experience and taking into account the mistakes made, you can move on to manufacturing a large number of cells.
Step 2 . Make blanks for the sides and top. For these purposes, it is recommended to use a mesh with cell dimensions of 25×25 mm, wire thickness 2.0 mm. Why so fat? Because the vertical elements must have sufficient strength, these are load-bearing parts. As we have already said, this design does not have an additional frame made of wood or rolled metal.
Make smaller blanks for the sidewalls
The length of the front panel is equal to the length of the bottom, the height is approximately 42 cm. The exact dimensions vary depending on the size of the cell - you need to choose such that the cut is made next to the dividing wire. To increase the rigidity of the structure, it is recommended to bend the front part in the upper part. Using the same algorithm, mark the side and rear parts. Cut them according to the marks, bend the stiffeners.
Step 3 . Place the bottom on a flat surface and fasten it to the back and side parts. Place and fix partitions at the required distance. You need to work with a clipper; if necessary, the staples are pressed with pliers. Connections can be made through two cells, the step does not have much effect on the strength of the structure, and the pushing forces are minimal. For reinforcement, galvanized wire with a diameter of 3–4 mm can be installed along all ribs.
Connect the cell parts with a clipper
Step 4 . Start making the doors. There are two options: one for each cell and three at once. The second option is easier to do, but it makes the process of caring for rabbits a little more complicated. While you are busy with one cage, animals can escape from the rest. The doors are made in this sequence.
- The mesh is cut to size, the front part is slightly bent so that it fits onto the vertical wall.
- At the back, the mesh is fixed with wire to the wall, but a strong clamp is not made. The mesh should turn without jamming.
For the door, the edge of the mesh is folded
When closed, the doors must be secured with carabiners or springs. If you wish, you can make homemade elementary hooks.
Installation of the floor in the rabbitry
You can use different materials to install the floor.
Floor in the rabbitry Source ytimg.com
Metal profile floor
This option is characterized by a long service life and ease of maintenance. The disadvantage of this design is the difficulty in its manufacture. Firstly, you will have to make such a grid yourself. Secondly, special attention to the cells, which must be very small so that the rabbits’ legs do not fall through.
Fine mesh floor
Fine mesh is easy to install and easy to maintain afterwards. But it may break. The design and long service life are no different. Typically, the service life is directly related to the quality of welding.
Wood slatted floor
Wooden slats – environmental friendliness and affordability in one. They are easy to install. But if the material is not initially processed properly, then rabbits can get splinters in their paws. Another drawback is the short service life. Soon such a floor will begin to rot and will need to be replaced.
You can combine these options.
Important! It is not advisable to use a non-mesh floor in the main compartment. This is due to the fact that waste products will penetrate through the holes and accumulate in the pan.
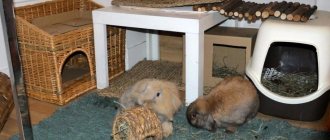
Age of rabbits
Age differences in rabbits play a big role in their maintenance. Newborn rabbits need contact with their mother and the cage is set up in accordance with the requirements of the queen cell.
A middle-aged individual needs an active lifestyle and appropriate attributes that support the healthy functioning of the rabbit - in case it must be with you for more than a year.
An adult rabbit should be provided with peace and quiet; it no longer requires a large space, so even the walking section can be either minimal or absent altogether.
Roof construction
To decorate the roof you will need a sheet of plywood and hinges used on doors or cabinets. First, the hinges are screwed to one of the upper frame beams. A sheet of plywood is laid on them, which fits tightly, otherwise drafts will appear.
In the place where the mesh connects to the boards, a board is installed that will go from floor to ceiling, and from wall to wall. A small hole should be made in it in advance, which will allow the animals to move freely.
The finished structure must be supported by supports. A pallet is formed at the bottom.
Ready-made cage for rabbits on supports Source unidoski.ru
You can make cages for rabbits from a profile pipe.
In two or more rooms
The number of premises is calculated in separate sections. Typically, two rooms are used, which include a nest and a walk.
Home maintenance will definitely require more space. The rabbit will spend most of its life in a pen, which will be much shorter if the pet is unable to lead a full-fledged lifestyle.
Most often, a lightweight manufacturing option is used, which is given here as an example.
They make a frame for the entire cage, which on average should be at least two meters in length, 70 cm in width, and 80 cm in height. The frame can be made from either wooden planks or metal wire, which, if possible, is welded in junction places. In addition, the wire can simply be bent in the corners or twisted with a spring for greater reliability.
Partitions with holes are installed, the floor is laid and a nesting compartment is constructed.
The body base is wrapped with mesh. It can be welded or tied using the winding method in those places where it connects to the strips or to the mutually perpendicular winding web.
A slot is made in the desired area and the door is mounted.
Even though you are making a cage for home use, it is important to note that drawing notes on complex calculations associated with detailed measurements of the pet and schematic images of rabbit pens should not be neglected.
Drawings of cages for rabbits are important because they allow you to visualize the structural object and freely adjust dimensional values.
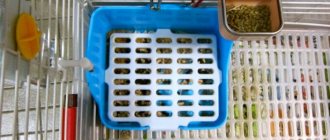
Feeders, drinkers and hay
It is important not only to have an idea of how to build a rabbit cage, but also how to properly equip it from the inside. Feeder, drinkers and hay are the constant attributes that must be present.
When equipping a drinking bowl, it is important to take into account the fact that it can be easily removed, since it will have to be washed frequently and the water in it changed. It is best to use trays made of metal strip for this purpose. Attach them to the cage door or next to it on the wall.
One of the most optimal options for making a drinking bowl is using sewer pipes. A scrap of this material with a diameter of 10 cm and a height of 8-10 cm is used to decorate the “cup holder”. A trimmed 2-liter plastic bottle fits into this ring. Cut it so that it is on the same level as the “cup holder”, leaving only a strip 2-3 cm wide and 5-7 cm long.
Types of cells
Each master makes his own small changes to the design of the cells, but they all have several main differences that allow them to be divided into three large groups.
Table. Design options for rabbit cages.
| Type of cells | Brief description of features |
Standard | The simplest designs are widely used among rabbit breeders. Such cages can be used either individually or in sections; the sizes are selected independently depending on the parameters of the breed. But most ordinary rabbit breeders make cages of standard sizes; they may have special sections for walking, queen cells and other additional rooms. Manure is always removed by hand. Taking into account the operating conditions of the products, the manufacturing material is selected. Feeders are always placed separately, which eliminates the possibility of food contamination. |
| Designs designed by I. N. Mikhailov | Such cages used to be widely used on industrial rabbit farms, but recently modern companies are abandoning outdated designs. Mikhailov cages make it possible to partially mechanize the removal of manure, install automatic drinkers, and provide special compartments for rabbits. Private owners rarely use them due to the complexity of manufacturing. |
Cells designed by N. I. Zolotukhin | Zolotukhin replaced the metal mesh on the floor in the cages with flat slate and plywood. There is a narrow strip of mesh at the back wall to collect manure. Feeders can tip over, making it easier to care for rabbits; unused feed can be easily removed. After many years of use, rabbit breeders began to abandon such cages due to design and technological shortcomings. The main one is an unsuccessful floor covering solution. The living conditions of the animals deteriorated significantly; not only did their daily weight gain noticeably decrease, but the quality of the skin also deteriorated, and mortality increased. |
Construction of a rabbitry according to the design of I. N. Mikhailov
Drawing of a standard cage for rabbits
Optimal size of a rabbit cage
Useful tips for building a rabbitry
Not all novice craftsmen know how to make a cage for rabbits, taking into account all the nuances, so mistakes are possible when making the structure.
For example, if you save material, this will lead to crowding, which negatively affects the health and reproduction of rabbits.
The uterine or nesting compartment must be made stationary. Any nooks and crannies can provoke the death of baby rabbits as a result of a stampede, as the female becomes frightened.
But when depositing young animals, it is recommended to use a cage with a stationary nook for rabbits. A small loophole in a compartment measuring 12x12 cm will allow the rabbits to get through there, while the female will not be able to get through and will not be able to be with them all the time. In the question of how to make rabbit cages, this option allows you to reduce the stress of the procedure for weaning offspring from a female rabbit.
How to make a cage tray
The pallet for the cage in which the rabbits will be kept is most often made of metal, since this material is convenient to use, it is easy to wash and clean, and it is also accessible and you can make the pallet yourself.
Below are detailed instructions that will tell you how to easily and quickly make such a necessary structure with your own hands.
Materials and tools for work
Materials you will need:
- galvanized sheet 123×200 cm;
- tray handle.
Required tools:
- roulette;
- riveter or small screws;
- metal spatula;
- hammer;
- metal scissors;
- board or block, for convenience, measure the required length;
- screwdriver or drill;
- drill to the size of the rivet or bolt for fastening;
- self-tapping screws for attaching the handle for the pallet.
Pallet for a rabbit cage: video
Step-by-step manufacturing instructions
- We measure from the galvanized sheet a blank for the cage pallet 100x60 cm of the appropriate size with a small margin, taking into account the desired height of the side. To do this, it is recommended to cut a piece 125 cm long, so that the length of the pallet is 105 cm plus 8 cm on each side for the height of the side and 2 cm on each edge for rolling, which will prevent the possibility of getting hurt on the sharp edge of the metal sheet.
- The width of the finished product will be 70 cm, leaving a small margin for debris falling out of the cage, so the width of the workpiece should be 70 cm plus 8 cm for the height of the pallet and also 2 cm for rolling for a total of 90 cm.
- So-called ears are cut out at the corners of the workpiece, which will help firmly fasten the structure.
- To roll the entire perimeter of the pallet, a wooden board or block is used, which is fixed with the knees along the fold line and, using a spatula, the sharp edge is folded until a closed or partially closed loop is formed.
- We bend the ears that are located at the four ends of the workpiece.
- Following the same principle, we bend the sides of the pallet: we fix the bend line with a wooden block or board, hook it with a spatula, and bend the sheet of metal up to 90°, pressing it against the block.
- For fastening lugs that were left in advance, it is recommended to cut off a strip of metal about 1 cm using scissors, so that when finally bent, the sharp edge of the lug is below the rolled edge of the pallet side.
- To secure the resulting structure, you need to take a screwdriver or drill, a drill the size of the rivet or screw that will fasten the pallet. Having firmly fixed the junction of the bead and the eye, we drill a hole. Secure with 2 rivets.
- Using a hammer, you can lightly knock down the metal at the joint to give additional strength to the structure.
- To attach the handle to the pallet, 4 self-tapping screws of the appropriate size are used.
Briefly about the main thing
Even for inexperienced craftsmen, there will be no problems with the question of how to make a cage for rabbits if you strictly follow all the instructions and recommendations.
To build a rabbitry, the dimensions of the future structure are first determined. It is advisable to start work by completing a drawing. Then a timber frame is constructed.
The next stage is the design of the floor. It can be made of metal profile, fine mesh cage or wooden slats.
After this, the plywood walls of the cage are made. The work is completed by decorating the roof and installing a tray where waste from the cage will fall.
A drinking bowl, feeder and hay barn are installed in the finished cage.
Ratings 0
Number of rabbits
Single housing implies approximate cage parameters: height - 40-60 cm, length - 100-150 cm, width - 60-80 cm.
Pair housing with the condition of preferential breeding should take into account the feeding, meeting and personal space of each rabbit. Groups of rabbits in production are most often kept in multi-tiered, but single cages.
As pets, several rabbits are housed in a large one-piece structure if the combination of their gender, breed and age suits you and the occupants.
Purpose and structure of the rabbitry
Livestock breeders call rabbitries buildings where rabbits' homes are located, or simply cages for animals that are housed together (indoors or outdoors).
Rabbit farms are built in accordance with GOST 23838.
A number of requirements are put forward to them:
1. Maintaining comfortable living conditions:
| Indicator name | Normal values |
| Temperature level | +10⁰С – +20⁰С |
| Illumination | 30 - 40 lux |
| Length of daylight | 16 - 18 hours |
| Humidity level | 60 — 75% |
| Airflow speed | 0.3 m/s |
| Air composition: | |
| - ammonia | less than 0.026% |
| - carbon dioxide | less than 0.5% |
2. Ease of maintenance.
3. The presence of a system for removing feces, with their subsequent disposal.
4. For closed accommodation - equipped lighting, ventilation and heating (in winter).
Typically, buildings for a rabbitry are made one-story, rectangular.
The cells are placed in rows (the width between them is 1.5 m) and in tiers (2 - 3).
In practice, rabbit breeders allocate frame-type sheds for rabbit hutches, and part of the building is separated for household needs and feed storage.
Ideal place for a rabbitry
Where a convenient rabbitry for the garden will be located is of great importance, so you should think about this in advance. During the day, when the sun is shining brightly, its rays should not directly hit the building area. Therefore, a place in the shade is ideal. In addition, it is very good if the structure is located on a small hill.
Any cool winds should under no circumstances appear near the rabbitry. The same goes for damp or stale air. You must also remember that there should not be a compost pit nearby. Such a neighborhood threatens the extinction of some or absolutely all animals.
It is also recommended to install this building away from various sources of noise, such as an enclosure with dogs and the like.
Making your own rabbit cage using the Mikhailov method
Rabbit cages built using the Mikhailov method are multi-tiered mini-farms. The structure consists of several tiers, each of which serves as the basis for the next. The bottom is made of slatted lattice, which ensures that manure falls into a special container. The walking compartment is equipped with feeders and drinking bowls. Food and water are replenished as needed.
The main advantage of mini-farms is minimal human participation in the production process, which ensures the absence of stress for shy animals.
Cages for rabbits Zolotukhina
This structure increases the efficiency of raising rabbits. The structure consists of three tiers. The higher ones are shifted relative to the lower ones by the width of the grid. There are two cells on each floor. The feeder is a tilting tray, which makes it possible to add food without opening the door.
This design is very popular.