An aquarium lid is an invariable attribute of any artificial reservoir, which protects the aquatic environment from unwanted elements getting inside and does not allow your beloved pets to leave the house. In addition, the aquarium lids serve as a holder for light bulbs that illuminate the tank, providing residents with daylight. Stores offer a wide range of covers for aquariums, but experienced aquarists make their own covers at home, due to non-standard tank shapes or personal preferences. Before you read the instructions on how to make a cover for an aquarium with your own hands, with or without backlighting, you need to find out what substances and elements you will need.
Benefits of homemade lids
Having become the owner of a spacious reservoir with clear water and colorful fish, any aquarist wants his pets to feel comfortable and live a long life. An important role in ensuring safety is played by the aquarium lid, which protects the peace of the inhabitants of the tank. However, many aquarists encounter difficulties when choosing a cover for a tank in the store - factory models, as a rule, are made from templates, and may not be suitable for a tank of non-standard shape or size. Of course, you can buy an aquarium with a lid, where the latter is included in the package, but even here many remain dissatisfied - according to the production, the lid is equipped with only 2 light bulbs, the light of which is not enough to create the right conditions for fish, shellfish and plants.
Therefore, fans of the underwater world build homemade aquarium covers, taking into account the shortcomings of the store assortment:
- Standard models are made using templates and are not suitable for vessels of unusual shape.
- Factory covers are equipped with two lighting devices. The light that the lamps emit is not enough to create favorable conditions in the tank, which leads to illness in pets and death of plants.
- The store assortment is represented by models that mainly consist of several elements. When planning to renew the water in the aquarium, such a coating will have to be disassembled, which is inconvenient and takes up extra time from the owner.
- Standard covers are designed in such a way that when closed, the containers are located close to the water level. And since the lid contains lamps, the liquid quickly warms up, disturbing the temperature regime of the phenotypes.
- Store-bought models are inconvenient because they have narrow compartments for wires and pipes. In addition, the factory covers are not ventilated, so the aquarist will have to remove the cover himself to ventilate the container.
Considering these disadvantages, it is useful for every fish holder to learn how to make an aquarium lid with your own hands.
Aquarium lighting with LED strip
The third lighting option is a moisture-resistant LED strip with a degree of protection IP65.
There is no need for cartridges, T-8, T-5 tubes, or chokes, but you will need a 12V power supply.
Sealed, waterproof power supplies are mounted both outside and inside the cover. Look at the dimensions of the aquarium.
A voltage of 220V is supplied to the block, and the 12V output through two conductors (“+” and “-“) goes to the contact pads of the tape.
Soldering points are sealed with hot-melt adhesive.
Read about all the nuances and connection diagrams for LED strip in separate articles.
What is good about LED strip? Firstly, low voltage. Secondly, if absolutely necessary, such lighting can be connected even from batteries, without an outlet, without 220V voltage and unnecessary wires.
At the same time, it works great on high-capacity 18650 batteries for quite a long time.
Please note that you cannot simply stick a powerful LED strip onto the surface of the lid. Otherwise, it will serve you for a couple of months and will burn out from overheating.
Special aluminum profiles are produced for such tapes. They play the role of a cooling radiator.
You attach such a profile to the lid (using small screws or hot glue), and then glue the backlight to it. In this form, the LED strip will last its entire warranty period.
By the way, a life hack for those who want to increase the backlight intensity without significant costs. Typically, an LED strip is glued in a straight line onto a flat surface and thus the stated number of lumens is obtained from it.
But you can do it a little differently. Take a plastic tube and wrap the tape around it in a spiral.
As you understand, for the same length of the cover, in this case you will use much more backlight, which means its brightness will increase.
The tube itself is attached to the lid using clips. In the presence of a reflective substrate, quite bright illumination comes out.
If possible, instead of a plastic tube, you can choose an aluminum one. This will significantly improve heat dissipation from heated diodes and increase their service life.
Materials
The base material from which the coating will be created must meet the following requirements:
- Environmental Safety.
- Water resistance.
- Waterproof.
- Rigidity and strength.
Beginner aquarists who are new to the arrangement and structure of home ponds have a question about what to make a lid from. You can build a covering for an aquarium from PVC, foamed PVC, panels, or plastic. High-quality plastic is used for the lid, meeting the above requirements. It is not recommended to make a covering from plexiglass - this material is transparent and unsuitable for lighting. In addition to the main material, you need to prepare:
- A special adhesive mixture that will securely hold the structure together.
- Corners – 4 pcs.
- Drill.
- Film/dye for decoration.
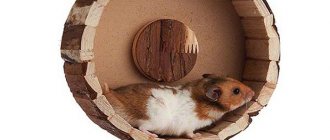
Wheels are different
The diameter of the wheel depends mainly on the size of the animal and the length of its stride. Of course, the wheel for a Djungarian hamster will be smaller than for a squirrel or chipmunk. A wheel that is too large will be difficult for the animal to rotate, and too wide gaps between the bars can lead to injury. Therefore, even before choosing a material, figure out what size wheel you need. For a squirrel or chipmunk its diameter will be approximately 40 cm, for a Syrian hamster 20 cm is enough.
Making the lid
Having prepared the necessary things, we begin to build a cover for the aquarium. DIY aquarium lid - instructions:
- According to the planned plan, the required size is outlined on the base material and 5 pieces are cut out - the side walls and the top of the structure.
- Having cut off the component parts, the walls and top are connected using glue in a circle. As a connector, you can use a cyanoacrylate adhesive mixture, carefully applying it to the base of the coating.
- Having received the drawer, you need to step back 3 cm from the edge and attach the plastic/metal corners. They are needed to prevent the coating from falling into the tank, and to fix the frame for reliability. At the same time, you can attach an electronic ballast to the coating for installing lighting fixtures.
- The next step is to cut a hole in the lid to supply food to the underwater inhabitants. Then cut holes for the filter tubes.
- From the outside, the finished structure is decorated using self-adhesive film or paint.
Ready-made options
Of the ready-made structures, we recommend the one known in Russia. It offers customers a variety of options - rectangular and panoramic aquariums. Available in small ones - 40x25 cm, and designed for a large tank - 120x40 cm, and rare 100x40 cm. There is almost any lid for a panoramic aquarium - from 50x30 to 120x40 cm. Color is not only black or gray, but also in the tone of oak, walnut, alder and others.
produces simple, inexpensive designs with a five-year warranty. engages in custom-made lid manufacturing, creating designs of any complexity.
Making backlight
Having built the lid according to the instructions, you can use a coating, however, experienced aquarists prefer to supplement homemade aquarium lids with lighting fixtures. To create light you will need:
- Electronic ballast – 4 pcs.
- Switch.
- Light wiring – 10 m (0.5 sec.).
- Red wire – 3 m (0.75 sec.).
- Holders and sockets for light bulbs.
- Electric plug.
Manufacturing:
- A hole is made for the switch on top of the created coating.
- A hole is cut out in the back wall adjacent to the wall of the room for the wires.
- Then they begin to connect the lighting fixtures: one electronic ballast is connected to one light bulb. The light bulbs will be fixed using holders.
- The lighting for the artificial pond is ready.
When constructing the backlight, you should carefully calculate the dimensions so that the lighting devices do not touch the liquid in the tank. You can make an aquarium with a glass lid, or a cover for a round tank, but making such models will require a lot of time and knowledge.
A lid for a home pond is an important element of the tank structure, which performs many useful functions. If you decide to make the coating yourself, you need to carefully calculate the dimensions of the lid and follow the instructions.
Preparing for work
Making your own lid is easy. The main thing is to choose the right material, calculate its quantity and dimensions of the finished product so that it sits tightly on the container and can withstand the load.
You will first need to take measurements, accurately taking the parameters of each wall, as well as the desired height. In order not to get confused in the future, it is better to make a drawing, which will indicate in detail and clearly which segment will go where.
Also important is the form itself. She can be anything. If this is a lid for a corner aquarium, then, accordingly, you need to calculate how it will sit. But even for a standard rectangular container you need to think through everything carefully, namely:
- How the walls will contact the glass;
- Are ventilation holes necessary?
- Will there be a need for doors through which access to the aquarium will be simplified for feeding, care, etc.;
- Where the holes for the filter, compressor and other equipment will be located.
In addition, for manufacturing you will need certain accessories and tools:
- Roulette;
- Pencil;
- Stationery knife;
- The material itself (PVC, laminate);
- Corners;
- Glue (optionally, liquid nails).
We recommend reading the article: How to make an aquarium with your own hands