What can you make a hamster house from?
The purpose of the house is to shelter the kids from prying eyes. The manufacturing material must be non-toxic, since the hamster will definitely taste it. The house will have to be cleaned; the animal should feel comfortable in it. The animal itself will show how it feels in it, having settled in a new nest.
Craftsmen make houses from cardboard and paper. Adapted for this: coconut shells, ready-made boxes, wooden planks and slats, plywood, toilet paper rollers and even popsicle sticks.
How to do it?
Making a homemade hamster cage at home is not difficult. You can even make a home from scrap materials that are likely to be found in every home. Here you can learn about several optimal options that are standards for building a hamster cage.
Plastic bottle cage
To make a home for a hamster from plastic bottles, you will need 3 bottles with a capacity of 6 liters.
- First you need to cut off the neck, leaving about 8–10 cm from the lid.
- Cut out the middle of the lid (threaded washer).
- Make holes in the side of the bottle equal to the diameter of the neck cap. Similar holes need to be made in only two bottles, and in the last one, holes must be made on both sides. In order to connect the bottles, you will have to insert the cut neck through the hole on one of them, but so that it also passes through the hole of the second bottle.
- To secure the bottle from the inside, secure the neck with a threaded washer.
- Similarly, attach the third bottle to those two.
- At the bottom of the bottles, make small holes for the rope so that the house can be moved or hung somewhere if necessary. Pass a strong rope through the hole you made.
Thus, you can make a three-room “apartment” for your pet.
From the box
The second simple way to make a cage is to create it from an ordinary cardboard box, for example, a shoe box. However, the bottom of the box will have to be filled with sawdust or special filler. Also, you should not make a cage out of a small, low box, otherwise the animal can easily leave the territory of its “apartment”. Prefer large, spacious boxes with taller sides.
Made of wood
You can also build a cage from ordinary wood. This method is more complicated than the previous two, however, a house made of wood will be much stronger and more attractive in appearance.
In order to build it, you will need pliers, a double-sided file, aluminum wire, a paint brush, an electric jigsaw (if not, you can replace it with a circular saw), fine mesh, side cutters, metal paints, plywood.
Frame.
- To begin with, you will need to make yourself a drawing for simplicity and then build the structure in accordance with it.
- Attach the mesh to the floor and cut out the parts you need from it.
- In the resulting blanks you need to make holes that will serve as doors and windows. Do not leave sharp protrusions so that the animal does not get hurt; always level them.
- Paint the grate or clean it with white spirit.
- Form door clamps using aluminum wire.
Once you have formed the frame, proceed to the pallet.
- Draw a drawing of the required parameters on a PVC sheet and saw off what is unnecessary (you shouldn’t throw away what’s left, as it will be useful for making sides).
- Next, the sides need to be glued to the sides, but first you need to check their parameters, where the height is 10 cm, the length for the sides is 42 cm, and for the back and front - 52 cm.
- It is necessary to glue the inside of the junction of the pallet and the side with plastic slats.
- Then you need to strengthen the joint between the sides and the pallet for greater reliability of fastening. This is done using plates of 6–8 cm. For a corner you need 2 plates with parameters of 8 by 10 cm.
- If you want to make legs for the house, you will need 16 pieces of plastic 5 by 5 cm. Glue each 4 to each other. These are the legs for the resulting structure. Move the frame into the finished pallet.
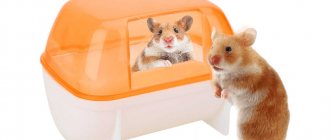
From a plastic container
Making a hamster house from a plastic container is the easiest of all methods.
In order to prepare the house, you just need to make a few air holes with a hot soldering iron. You can also make a hole for the door. Fill the bottom of the container with filler or sawdust.
From the aquarium
You can turn any large enough aquarium into a hamster's home. You just need to fill the bottom of the aquarium with a special filler and put there everything necessary for the animal, such as a bowl, drinking bowl and wheel. You can install wooden or plastic ladders.
The aquarium should be at least 20 cm high and about 40–50 cm long. The ideal shape is rectangular. The most uncomfortable shapes of an aquarium for a hamster will be round or square.
Paper house for Djungarian hamster
This temporary house will not last long. Some animals deal with it in one night. Its advantages: minimal costs and fast production. For this design you will need: toilet paper, a bowl of water and a balloon.
The procedure is as follows:
- inflate the balloon to the size of a large apple;
- Divide the toilet paper into separate sheets and moisten with water;
- stick the sheets onto the ball until about 8 layers are formed on it;
- send the structure to dry on the battery;
- pierce the ball with a needle or simply deflate;
- remove the balloon from the paper frame;
- Make an entrance for the hamster in the paper frame.
The room will resemble a hemisphere. This house is suitable for a dwarf hamster. It is short-lived and fragile.
Plastic house
To create a plastic house, a familiar plastic container, which is used for storing food, is suitable. The size will depend only on the preferences of your pet and the “filling” of the living space.
Draw a rectangle measuring 45x15 cm on the lid of the container and cut it out with scissors. Cut a 50x20 cm rectangle from a plastic or metal mesh. Using super glue, attach the mesh to the lid of the container. Simple manipulations made it possible to obtain ventilation. If you don't want to mess with glue, use bolts and nuts.
If the shaggy resident is of royal blood, and your plan is to build a real palace. Take another container and ventilate it using the method described above. Using a sharp knife, cut holes on the sides of both containers and insert a cardboard or plastic tube into it and secure with glue. Remember that the diameter of the tunnel-pipe must be sufficient for the hamster.
Coconut shell hamster house
This design is more durable than the previous version. Despite the apparent simplicity of production, you will have to tinker with it for several hours, scraping the pulp out of the fruit. The dwelling turns out to be quite small, so it will serve as a shelter for the Djungarian hamster. Select a coconut and get to work:
You can stop there, but the home will turn out to be unstable and will roll around the cage. To avoid this, install the coconut house with the cut hole down.
On one side, draw a small arch and cut it along the contour. Sand the edges. This will be the entrance to the house. Drill holes for ventilation. If desired, you can make decorative windows on the side.
Features of buildings for Dzungarian and Syrian breeds
The sizes of houses for Syrian and Djungarian hamsters should be different
Each hamster house should be designed taking into account the size and habits of your furry pet. It is important that the active and nimble dwarfs have the opportunity to play; the rodents should be comfortable and safe in the house. Djungarian or Syrian hamsters need material to build a nest; it must be soft and environmentally friendly. It can be cotton wool, napkins, but not newspaper - the lead alloy for casting typographic fonts is dangerous for animals.
It is also necessary to take into account that small animals can escape from the house through cracks caused by poor-quality fastening of parts during manufacturing; chew a hole, finding its weak point. And larger Syrian hamsters can get stuck in a tunnel opening that is too narrow, which can be very frightening for them. Therefore, you need to take into account all the little things and constantly check your home.
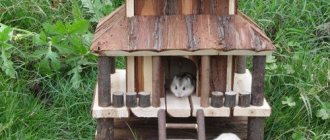
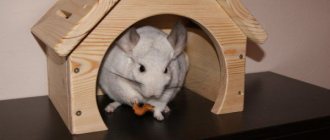
Wooden house for a hamster
Depending on the size, such housing can be made for both the Syrian hamster and its dwarf counterparts. The simplest design is made in the shape of a box with a removable roof, ventilation holes and an entrance for the animal. To start work, you need to prepare a sheet of plywood or a wooden board 1-4 cm thick. Plywood is more convenient. It is cheaper, easier to handle, and the hamster will not chew it so quickly. Hardwood is suitable for manufacturing.
Make markings on the prepared sheets. If the house is intended for a small hamster, the length of the front and back walls is 15 cm, with a height of 10 cm. The side walls are 10x10 cm. The lower part of the structure remains open, and for the top we put it on sheets of 17x12 cm. This is necessary so that the roof does not fall inward boxes. On the front surface it is necessary to cut out an entrance and a window, which will serve as additional ventilation. To make it easier to fasten sheets of plywood, you can nail narrow slats at the joints. To work you will need:
Each plywood part must be filed and cleaned with sandpaper. The hole for entry and ventilation is also treated with sandpaper.
First, we assemble the walls, nailing them or fastening them with screws. We place the roof on top without fixing it to the frame for ease of cleaning the room.
If it is difficult to calculate the design parameters for your animal, take a cardboard box of the required dimensions. Measure its parameters and mark the length and width you need on the plywood.
Possible problems and ways to solve them
With all its positive qualities, the hamster can hardly be called the smartest of all pets. This animal is less trainable than its larger “competitors,” needs communication, and shows a willingness to do what is expected of it.
For this reason, you should always be prepared for the fact that a house lovingly built for a rodent will not be used “for its intended purpose.” However, do not despair, perhaps the problem can be solved.
Hamster doesn't sleep in the house
There may be several reasons for a hamster’s refusal to accept the “living space” provided at its disposal:
- The material from which the house is made, or the bedding placed inside, causes allergies in the animal or causes it other inconveniences (unpleasant odor, uncomfortable texture, sharp edges, etc.). Analyze what raw materials you used and, if possible, correct the mistake.
- The animal did not understand the purpose of the new design. Perhaps it is worth trying to place some object inside the home that has a familiar aroma, and the inhabitant will change his opinion about the strange design.
- The hamster uses the room as a warehouse for storing supplies and there is simply no room left for him to stay inside. In this case, it is worth thinking about a more spacious home or a second house (it is not at all necessary that there be one).
- The exit from the room is too narrow , and it is uncomfortable for the animal to perform complex maneuvers every time.
- The opposite reason: the exit is located in such a way that the animal simply has nowhere to hide inside, and it is forced to look for more secluded corners in the cage.
- Lack of ventilation if the home is not designed correctly can make it too hot and stuffy. Think about how to add additional windows to your house.
- Housing is too cramped. If there is no room for the hamster to move inside the house, he is unlikely to choose it for rest. The dimensions of the structure must be compared with the dimensions of the resident.
If all the mentioned reasons are excluded, and the hamster still stubbornly refuses to live in the house, you should probably leave the animal alone, giving it the right to independently choose a place to spend time. Perhaps over time your pet's tastes will change.
Hamster house out of a box
Using the same principle as a wooden house, you can make a house out of a box.
To do this, we will prepare a “pattern” from cardboard. We connect the walls with glue that is harmless to the animal, and cut out the entrance and windows with a stationery knife or scissors.
You can go the very simple route by using a tissue box.
Be sure to remove the plastic film from the box!
These boxes are convenient because they already have ready-made holes; they will serve as an entrance for the hamster. If you have a square box, you can simply cut it in two so that the cut line goes right down the middle of the napkin dispenser window. You will receive 2 identical houses for small animals. If the box is rectangular, you will have to make two cuts so that the future house has compact dimensions and stands stably in the cage.
Take the cardboard tube left over from the toilet paper and insert it into the opening of the box. Attach it to the edges of the hole with glue, secure it and let it dry. You have a house with a tunnel entrance.
Home accessories
In order for the rodent to like the house and for the baby to grow up healthy and active in it, the housing needs to be filled with suitable accessories..
Educational toys for hamster
- Running wheel. Its dimensions depend on the size of the rodent: for the Djungarian it is a twenty-centimeter toy, for large specimens, including Syrian ones, up to 30 cm. The path on it must be continuous; it is not permissible to use a mesh for this, which can cause injury. It is important to know that hamsters like to stay awake at night, so the toy should be silent.
- Tunnels. They should be spacious and well ventilated.
- Hammocks for a hamster made from tubes of different diameters or a swing in the form of four posts, a crossbar and a perch for sitting.
- Wooden bridges or other objects for developing hamster teeth. It is good to use mineral stones and crayons. Cardboard boxes, toilet paper rolls, and branches of fruit trees are also suitable for these purposes.
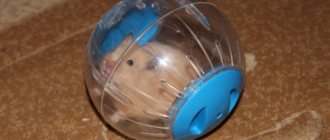
- A walking ball made of safe plastic in different colors with ventilation holes and recesses for the paws.
Drinking and eating facilities
It is very important to choose the right feeder and water bowl for your rodent.
There must be a special drinking bowl in the house for drinking. You can make it yourself or use a bowl, which should be covered so that food or parts of the bedding do not fall into it. Small species of hamsters like to dig up pieces of food, so you can put them in the bedding. Large specimens require a stable food bowl that is difficult to tip over.
It is better to provide 2 containers - one for wet food and the other for dry food. Typically, rodents like to sit in the feeder, so it should be spacious enough. It is also important that there is a separate “pantry” for supplies that the hamster will definitely make. This could be a container in a secluded corner of the house. The hamster himself will “tell you” where his hiding place is, you just have to watch him carefully and then place a bowl there.
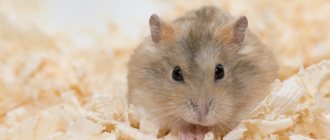
Hamster bedding
Bedding is very important for keeping the house clean and creating comfort and coziness. It can be pressed sawdust, but not too small so that it gets into the baby’s nose or gets tangled in his fur.
If wood pellets are used, they should be odorless and quickly turn into dust. Sawdust from coniferous trees can cause allergies in the animal, and fabrics and cotton wool are dangerous because they can tear into fibers in which the hamster can become entangled.
The best bedding materials for a hamster in a house are pieces of corn cobs with kernels, which can also be buried. Paper napkins or white unscented toilet paper are suitable for this.
The floor layer should be at least 6 cm deep, because hamsters love to play and burrow into it. When it gets colder, its thickness increases. It needs to be cleaned daily and changed once a week. A little granules from the previous bedding should be added to the fresh litter so that the familiar smell remains, otherwise the animal will become nervous.
Toilet
Hamsters are known for their cleanliness, so they need a separate place in the house for the toilet. You will have to clean it daily, removing waste and adding clean bedding. A cardboard tray is well suited for this purpose; this material is replaced quite often, because... it absorbs urine well, partially absorbing its odor.
The litter filler is often special clean sand, which the animal likes to rummage in, scattering it around. But sand does not hold odors well, so it needs to be changed often. Cat litter or mineral granules are not suitable for this - they can cause poisoning or allergies in your furry friend.
Sand bath
This is an important element of equipping a house for a hamster that does not like water treatments. They can be successfully replaced by bathing in special sand for chinchillas. To clean the fur from grease and dirt, place a high container with a ladder in the house. Let's assume an option with a hole cut in the side. It is closed on top with a lid that prevents the contents of the container from spilling out. The volume of the bath should be twice the size of the furry pet, and its sides should be high enough.
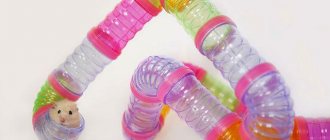
Very simple houses made from toilet paper tubes
It may be difficult to call this structure a dwelling in the general sense of the word, but they are suitable as shelters for animals. They are non-toxic, hidden from view and well ventilated.
For homemade tube houses, not only toilet paper is suitable, but also paper towels. Take the tube and flatten it. Using scissors, cut a semicircle on each side. Do the same operation with the second tube. Insert one tube into the hole of the other. This cross-shaped structure is suitable for dwarf hamsters.
DIY pet house
It doesn’t matter what material you take to make a house, say, you want a plastic house and take an ordinary bottle, showing a little imagination. It is important to remember that safety must be maintained
An important step is to figure out what can be used to treat the top of the box so that light does not enter the house.
Hamsters love houses
Some experts advise using paint, but this is not safe, since the pet can chew it and then get poisoned. Therefore, it is best to use the second option - fabric. It can be glued directly to the house.
Then sand down any sharp corners that could cause injury to the animal. In addition, you can make homemade two-story rooms for hamsters.
coconut house
Many people are interested in how to make a house for a hamster from a coconut fruit. This is an excellent option, since the animal will not be able to chew it off and practically nothing needs to be done. Making coconut housing consists of several stages.
- The first thing you need is to buy a coconut. Choose a medium-sized coconut so that the animal can fit in it and still have room. You should also not take fruits that are already rotten.
- Then you need to drain all the liquid from the coconut. To do this, you need to make a small hole to the middle of the fruit and turn it over.
- After all the liquid has left the fruit, place it on the table and make a mark where the future entrance for the rodent will be.
- You will need to make a hole of at least 5 cm so that the animal can crawl through it; you do not need to make a hole that is too large, then the coconut will not retain heat.
- After you make a hole, you need to take out all the pulp from there. Wash the inside of the coconut thoroughly and then use stiff paper to sand down the inside.
The home is ready. You can safely put it in the cage, but it is best to secure the fruit so that it does not roll around the entire cage.
Sometimes it becomes difficult to extract the pulp. To somehow facilitate this process, it is best to make a hole and leave it in the freezer for one night. Then the next morning you will be able to see that the pulp will already be separated from the coconut.
Plywood house
A plywood house for rodents is built on almost the same principle as a birdhouse for birds. You will need plywood for this, preferably multilayer, or you can use wood about 4 cm.
Then you make two wooden bases with a total length of 13 cm, they must be cut and sanded correctly so that there are no snags and two more blanks, their length should be 15 cm each.
But you can choose the height of the house yourself so that your pet does not feel cramped and feels comfortable. It is desirable that it be at least 7 cm. Make a large hole on one of the parts, its diameter should be about 7 cm - this will be the entrance for the pet.
Also, so that air passes well and moisture does not linger, it is necessary to make several holes: 2 -3. After this, sand all the holes so that everything is good and then fasten all the parts together with nails.
The nails should not stick out inside the house; it is best for them to go outside. Nail them well so that they do not stick out at all and the animal cannot get hurt on them.
House made of tubes
This is one of the most economical and simplest ways to make a house for a rodent. You can make a home for your hamster from cardboard tubes from toilet paper rolls or paper towels.
- you need to take one tube and flatten it well;
- after that, cut out semicircles on both sides;
- straighten the tube that you folded before;
- Do exactly the same procedures with the second tube;
- insert one tube into another.
And that’s it, the labyrinth house is ready for your pet. Additionally, you can put a thyrsus in the cage; its price is low.
https://youtube.com/watch?v=JuULc5CZ7Zg
Shelter for animals made from plastic bottles
Such houses can be made for small and large hamsters. It all depends on the size of the bottle. There are many options for housing design, we will consider 2.
A simple one-bottle shelter option
To build a house, let's take a bottle that fits the width of the bottom for the animal. The lower part of the dish will be a shelter for the hamster. We cut off this part of the bottle, turn it over with the cut side down and make a semicircular entrance. Using a hot knitting needle, we pierce holes for air exchange around the perimeter of the house. We cover the cut edges of the bottle and the entrance with electrical tape so that the hamster does not get injured from the sharp edges. You can not cut out the entrance, but put a piece of the bottle on its side, and its cut will serve as the entrance. The container should be dark so that the animal feels protected.
House of two bottles
Using two bottles you can make a slightly more complex design.
Both containers are processed the same way. We cut off the bottom and neck of them. We wrap the edges first with electrical tape. In the middle of the first bottle we make a hole the same size as the second one. We do this using a stationery knife. First we make a cross-shaped cut, then bend the edges, being careful not to pull too hard. The plastic is very fragile and can crack. Insert scissors and cut a hole. Apply electrical tape to the circle. For a tighter fit, we flatten the edges of the bottle that we will insert into the hole and cut off the top and bottom edges diagonally. Wrap the edge with electrical tape. We insert the bottle into the first one. If the edges fit tightly enough, we tie the two bottles together with electrical tape.
How to set up a hamster cage?
Important criteria when choosing a building material for creating a cage in which a hamster will live are strength and safety. The size of housing is not so important for these cuties, however, large cages allow you to place all kinds of accessories for games and fun that will appeal to pets and their owners.
Cage made from plastic boxes or bottles
Capacious plastic containers, after minor modifications, become ideal for housing pets. A smaller box is suitable for a Djungarian hamster, a slightly larger one is suitable for a Syrian hamster.
The disadvantage of the design is the lack of ventilation, which can be corrected by making inserts of fine lattice in the sides and roof of the future house. The advantage of plastic: it can be freely cut with a knife or scissors, pierced with a heated awl to create holes for self-tapping screws.
Important! The sharp ends of self-tapping screws or screws should be directed outward to avoid injury to animals.
If two containers are placed one above the other, you can save on space for a second pet or equip a single animal with a second floor. In the latter case, the boxes are combined using a tunnel or ladder. Hamsters love transitions and loopholes.
The simplest tunnel can be easily made from a pair of ordinary plastic bottles, cutting them off on both sides and wrapping the sections with electrical tape. All that remains is to connect the containers together and secure them. Some owners prefer to make transitions from corrugated or sewer pipes.
For some time, a hamster can live in a house made of three six-liter plastic bottles. The upper part is cut off from them, which needs to be reduced so that a funnel with threads and a lid remains. The dishes are arranged in the form of a triangle or one on top of the other vertically. So that the animal can use all the rooms, holes are cut in the lower part of the bottles according to the size of the neck, into which blanks are inserted, playing the role of mini-tunnels.
Important! Cages made from plastic boxes or bottles can be supplemented with appropriate links and expand the living space of hamsters to reasonable limits.
Metal cage for hamster
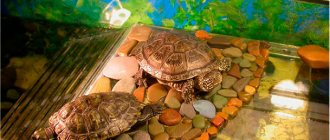
Aquarium cage from the store
An aquarium or terrarium, as a home for a rodent, has certain advantages:
- excellent review;
- retention of odors inside the container.
- high humidity;
- fragile design;
- difficulty in attaching accessories;
- heavy weight.
In most cases, owners cover the finished glass box with mesh. In the case of a low aquarium, it is metal; for a high capacity, the mesh material is not important. The cold bottom is lined with a thick layer of sawdust. As an option, use a plexiglass box, which is much warmer and lighter. On the other hand, it is cloudy and prone to scratches.
Interior and exterior design
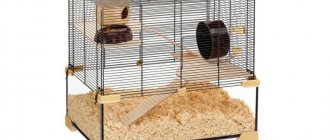
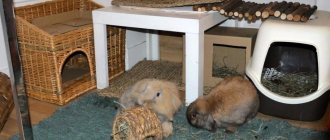
Arranging a cage for an animal involves equipping it with various accessories. This includes a hammock, a running wheel, tunnels, a house, a drinking bowl, and a feeding trough.
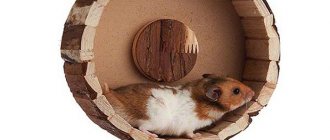
- Wheel. Running in circles will satisfy your hamster's need for movement. The diameter is determined by the size of the animal. A twenty-centimeter design is enough for Djungarians; wheels with a diameter of 30 cm are suitable for Syrians. As they grow older, the device is replaced with another one in accordance with the growth of the animal.
Article on the topic: Harness and leash for a cat: accessories for walks and trips
Wooden cage for hamster
Important! Choose a solid treadmill; the grid can injure your paws.
- Tunnel. Helps maintain an active lifestyle. It is also selected according to the size of the pet. The main condition: so that the hamster does not get stuck.
- Hammock. Plastic or metal rocking chairs are responsible for the development of coordination of movements.
- Drinking bowl . The animal must be provided daily with clean drinking water poured into a nipple drinker or bowl.
- Feeder. It is not necessary to acquire a special container that is difficult to turn over; food can be scattered throughout the cage. It is useful for a hamster, especially the Djungarian breed, to hone its instinct to search for food.
- Litter. As a rule, dense, odorless wood pellets or large pressed sawdust, with the exception of cedar and pine, are poured onto the bottom of the cage. Such sawdust can cause allergic reactions or bronchospasm. An alternative option is finely chopped ears of corn, which the animals love to burrow into. Mineral litters are toxic to rodents, and cat litters should not contain clay. The minimum depth of litter is 6 centimeters.
- Nesting material. To set up a nest, hamsters are allowed to offer unscented toilet paper, paper napkins or towels torn into pieces.
Toys such as toilet paper rolls or cardboard boxes will occupy the hamster's attention for a long time until he chews them. Mineral stones are used to grind teeth.
Important! When the air temperature in the room is high, it is advisable to place a piece of ceramic tile or tile with ground edges in the cage. These objects remain cool even in the heat and the animals will be able to cool themselves by lying on them.
Where to put the housing?
Since hamsters frolic in the dark and gain strength during the day, it is not difficult to guess where to place his apartment. It is worth placing an aquarium for a hamster in a quiet and cozy corner without direct sunlight . The hamster will get a chance to get a good night's sleep during the day, because he will not be disturbed by the sun or human fuss. Also, do not forget to avoid drafts so that the tiny creature does not catch a cold.
As you can see, setting up a terrarium for your furry friend is not difficult. All the details of the hamster’s interior can be easily constructed by hand , and this helps save your material resources. Step-by-step instructions are described in full in this article.
The main criteria for housing a hamster
Houses for hamsters should not be large, the main thing is that there is enough space for the animal itself, some hay or cotton wool, and for food, which they usually hide in their homes. That is why a hamster will feel comfortable in a cozy house, because by nature they are those who love various secluded places, and so that they can hide as much as possible there.
The size of the house is very important for a hamster, as it should not be too big or too small. The optimal size of a house for a hamster is 8*8*7 cm. But, it is also necessary to take into account the fact that rodents, despite the fact that they are all the same breeds, have completely different sizes (it all depends on how much you fatten them), That is why it is necessary to build on this when choosing a home.
When choosing houses for hamsters, carefully ensure that the material from which the house will be made is good and breathable. In no case should the rodent's home be too dry or humid, otherwise the hamster may hibernate for several days.
How to make a house for your hamster with your own hands? It is best not to use packaging such as tetrapacks, as well as plastic bottles - these materials do not allow air to pass through well, and if it is hot, the pet may suffocate from the heat.
What types of pet houses are there?
Thanks to the fact that today there are pet stores, you can find many different accessories for animals, especially rodents, including housing. They differ from each other in material of manufacture, size and purpose.
Wooden house
A wooden house for a hamster is an excellent option. Firstly, natural wood is used to make a home, and secondly, wood is a material that conducts air well, but at the same time retains heat. And this is very good, since hamsters are those who adore warm temperatures. Such a home is inexpensive and looks like a box.
Wooden dwellings come in different shapes. They can be:
The shape itself is not important for your pet; you choose it based on the shape of your cage. You cannot take a large house and so that it completely fills the area of the cage, the rodent must always have a free corner so that it can run around or go to the toilet.
The downside of such a house is that rodents are rodents to taste absolutely everything. And it is precisely this object that will become the pet’s wooden housing, so over time it will be necessary to exchange it for a new housing.
Also, sometimes hamsters can go to the toilet at home and then wood is not a practical material, since it will be difficult to wash. But this is quite rare; hamsters are very clean people and usually go to the toilet outside the territory of their home.
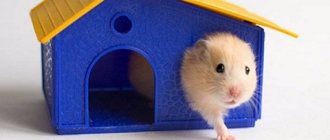
Plastic house
These are the most popular types of housing for hamsters as they are practical and cheap. Plastic does not retain moisture and allows air to pass through well. Plastic material is much easier to clean from dirt and dries faster. A plastic house can be two-story, depending on your preferences.
But the disadvantage of such material is that they often use bad plastic to make such rooms and, in fact, they turn out to be quite toxic, because of this the animal will either not live at all, or it will significantly affect health and sometimes this may be fatal.
Also, as mentioned earlier, pets like to chew a lot, especially if it is plastic - it is very easy to chew it. Therefore, most likely, when you wake up one morning, you will not find the house, and again this will greatly affect the health of the pet.
Ceramic house
In fact, ceramic houses are one of the best options for hamsters. It’s easy to wash the material, and your pet won’t be able to chew it off, but such houses are quite rare and they cost a lot.
But sometimes there are problems such as the fact that ceramics do not allow air to pass through well and accumulate too much moisture inside, which can greatly affect the health of the pet. To prevent this from happening, you need to look for ceramic houses, such that there is an opening for entry and, as it were, a window for the hamster. This will make air circulation much better.
Pets are different and some will be able to gnaw off a kuramic dwelling, but others will not even touch it, but will peacefully snort there and hide food. By the way, under no circumstances throw anything out of the rodent’s home, as this will cause him anxiety and then he will refuse to sleep in it. Hamsters arrange their own homes, so first put the house in the cage so that your pet gets used to it. And then put hay inside, how much is difficult to say exactly, but half of the house should be covered with it.
Making a cage
To build a strong hamster cage with your own hands, you need to have basic carpentry skills. You can involve children in the process; they will be happy to help you draw up a project for your future cottage. Together you will build a unique cage for the dwarf, in which the animal will be comfortable!
Listed below are theses from which you will learn how to make a reliable and comfortable cage for a hamster with your own hands.
Make a project
When designing a homemade house for a hamster, you should approach it responsibly and think in advance about the area and height, the number of tiers and their location. You should make a detailed drawing in three-dimensional orientation, first put on it the supporting structures, then the levels and rooms, and then mark the places for furniture and attractions.
Important! Don't forget to sign the dimensions of future parts. If you don’t sign it and do everything “by eye”, the cottage for the fluffy will turn out lopsided.
Select material
The drawing is ready, now we should discuss the materials. Typically, a do-it-yourself hamster house is made from wood or plywood (frame and floor) and metal mesh (walls and ceiling). But a wooden surface retains unpleasant odors for a long time, so it is better to cover it with a piece of linoleum. All that remains is to prepare nails, screws and tools.
Make blanks
The most crucial moment. Guided by the project, you need to cut out the details of the future cage for the dwarf. Take the dimensions from your drawing. First of all, we make the floor, then the frame beams, and lastly the walls and partitions. Cut the metal mesh with a margin of 3-5 cm.
Build a cottage
To assemble the structure, you should adhere to the following plan:
- Lay linoleum on the base of the cage. Screw the supporting beams to the floor with screws.
- Place horizontal beams (roof base) on the supporting structures and nail them.
- Make tiers out of plywood.
- Stretch the mesh along the outer perimeter and attach it to the wooden parts with a construction stapler.
- The ceiling can be made from a sheet of plywood or mesh.
Attention! Make sure that the ends of the nails do not protrude into the cage. The sharp edges of the metal mesh should be on the outside.
A strong cage for the dwarf is ready. All that remains is to lay the filler and add the necessary furniture and attractions. Your furbaby can move in!