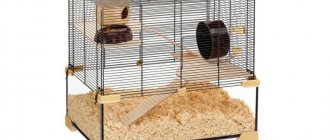
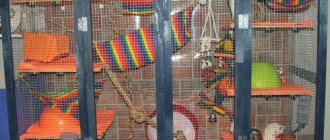
When sleeping, the rat likes to climb higher, so the pet’s cage must be equipped with a hanging bed. A hammock for rodents can be purchased at the store, but it is easier and cheaper to make one yourself.
Let's find out what materials can be used to create a cozy nest for a pet rat, what are the typical sizes, and where you can find patterns.
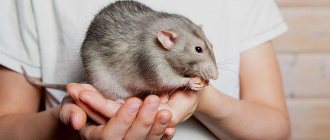
Joint games with a rat
Even after providing your little pet with a variety of toys, do not forget that the rodent will never refuse to play with its beloved owner.
It's easy to make a toy for your pets to play together - just tie a rustling candy wrapper to a thread and let the rat run after it. Most rats chase candy wrappers just like kittens and owners even take photos of their pets during this fun game. You can also play with the animal with your own hand, bringing your fingers closer to the rat and moving them back. The animal will watch the movements of the owner's fingers and after a while will begin to rush after them, squealing with pleasure.
Any toy for rats, made with your own hands or purchased in a store, will help the pet have fun and have fun, but cannot completely replace communication with the owner. Therefore, it is necessary to give the small rodent enough attention and care, because only then will the animal feel satisfied and happy.
Simple DIY hammocks
You can buy elegant cradles at a pet store, but it’s more profitable to make them yourself. It's not difficult and allows you to use your imagination.
Hammock made of jeans
The easiest option is to use old jeans as a hammock. If the cage is large, you can hang them entirely, but it’s easier to cut off part of the pant leg:
- Cut off a piece of “trouser leg”;
- Cut 2 holes on the top for the animal to enter;
- Attach 4 large paper clips to the corners of the top.
These staples can be used to connect the trouser leg pipe to the ceiling of the cage. Usually you need several paper clips for each corner, which are connected in a chain. You can connect a hammock to a cage with more than just paper clips. You can sew strong ribbons or chains to the corners of the jeans.
Hanging fabric hammock
The convenience of this option is that you can take any old sheet or towel and make a hanging bed out of them. Tie cotton fabric at the corners to the edges of the cage to create a rat cradle.
For beauty, you can purchase special material, such as fleece. Patterns can be square or triangular in shape. The latter are suitable for the corner of the cage.
To create a decorative cradle you need:
- Place two different colored pieces of fabric together and pin them at the corners.
- Cut a square out of fabric.
- Draw identical arcs on each side of the square. This can be done using a pattern or simply attaching a saucer. The arcs should not reach the corner.
- Cut the fabric along the drawn lines.
- Remove the pins and secure the ribbons bent in half between the pieces of fabric. The length of the ribbon is about 30 cm. The free ends are needed to tie the hammock to the cage.
- Sew colored patches together.
The hammock is ready. It has different colored sides, bright ribbons at the corners and an unusual shape.
Hammock from the hood
The hood can become a hanging hammock in the form of a pipe. You will need scissors, a sewing machine, thick wire for the frame:
- Cut the zipper from the hood.
- Fold the cut area 1 cm and sew around the perimeter.
- Insert the frame wire into the resulting fold. This will be the entrance to the hole.
- Sew up the former hole for the face. Now you have a bag with “exit through the neck”.
- Use ties to secure the hole hammock to the ceiling of the cage. Since the laces are on one side, cut off a part of them and fasten them to the opposite end of the tunnel.
Pets love closed cradles in the shape of a cocoon or tube. This gives them a chance to hide.
How to tie a hammock
For those who love and know how to use crochet, a knitted version of a hammock is suitable. It can be made from wool in 3-4 threads or acrylic threads. A simple option is to knit a 15x20 cm fabric using single crochets. To secure the hammock in the cage you need to make ropes. To do this, knit the fabric in a circle to 1 corner. At this point you need to make a chain of 20 air loops and knit it with a single crochet. Then you need to move to the next corner, where you need to repeat all this. So you should go around all the corners. The result will be 4 ropes.
Another option is a hand-knitted hammock. You can use available materials. Cut strips from an old sheet. It is better to cut in a circle to get 1 long strip. Cast on a circular chain of chain stitches of 30-40 pieces and knit with or without a double crochet. In the first row you need to add one loop every 5, in the second - every 8, in the third - every 15, etc. to the desired width. Several rows should be knitted without changing, and then, in the reverse order, decrease the loops.
What else can you use to make a cradle for a decorative rat?
Most likely, your pet will be happy with almost any hanging structure made from clothing. Hats, thick tights, and scarves will be used. You can make a hammock from an old washcloth, tying it with a wire frame. Several hammocks placed one after the other will allow a rat to run across a suspension bridge. Hammocks can be secured with ropes, ribbons, carabiners, and paper clips. You can put eyelets at the corners of the fabric and pull through decorative cords. It all depends on desire and capabilities.
A rat hammock is a universal thing. You can sleep and play in it, as well as make your own dining room. Animals love to live under the ceiling, so they prefer suspended structures to being on the floor. Removable hammocks are easier to clean out debris than to shovel it out of the corners of the cage.
If you like to make things, you might be interested in our material on how to make a house for a rat yourself.
Source
Rectangular hammock made of fleece strips
If you have time and are eager to make something intricate for your pet, try making a hammock woven from individual strips of fleece fabric. To do this, you will need to take two fleece rectangles (preferably in different colors) of the sizes indicated above. The rectangles are cut into separate strips approximately 3 centimeters wide and intertwined, as in the picture below.
They are secured with pins, after which the edges of the strips are folded on both sides and stitched. Now they need to be processed. To do this, take a strip of durable fabric of a suitable color, fold it, smooth it and make a edging of the edges (stitched on a typewriter).
Eyelets are installed on the corners of the finished product. Strong ribbons of a suitable color are threaded through them. To increase the strength of the hammock, it is advisable to stitch it crosswise in the middle or diagonally so that the strips diverge less.
The appearance of the finished hammock is presented below. It is more difficult to sew such a hammock for a rat with your own hands, but the result is worth the effort: the product looks bright and impressive.
Additional accessories for chinchillas
Placing an animal in a new cage is only the first stage of creating a cozy atmosphere for it. In order for a chinchilla to enjoy life, be healthy and active, its place of residence will need to be provided with additional details. What's on this list?
House
One of the mandatory additions to the cage. You can immediately buy a metal cage or a wooden one, or a profile display case with a house. And if you have purchased a display case, or the simplest metal cage, or you want to independently organize a place of residence for a South American rodent, you will need to provide a home for the pet as the main addition. This way the animal can climb into it at any time and rest. The size of the sleeping place is slightly larger than that of an adult chinchilla, because they like to lie down at their full height.
Cozy homemade house for a rodent
Feeder
An essential element of the cage, which is best attached to the bottom or wall of the cage, and should also be washed systematically. There are no restrictions on materials. The most convenient option is a plastic food bowl. The main thing is that it has a comfortable shape for the animal and is moderately deep.
Feeder attached to the cage wall
Drinking bowl
Another important accessory that will need to be attached to the bars of the wall or door. It should always contain clean and fresh water, and the structure itself should not allow leaks. Unlike the feeder, it cannot be placed on the floor, otherwise the water may become contaminated. The breeder can choose one of two common drinker options - ball or nipple.
It is better to attach a glass drinking bowl to a cage
It is necessary to select the one that will be convenient for a particular pet. Another important nuance is that you should not buy a plastic drinking bowl, otherwise the chinchilla can quickly chew through it. The best option is glass.
Sennitsa
She's a feeder with hay. The latter must be present in the chinchilla’s diet to maintain the health of the animal. If you leave hay just like that on the floor, it will soon be naturally distributed throughout the cage. But you should also be careful with the design of the hay feeder. It is best when it is a separate small house. An alternative is to use a small mouse or hamster running wheel that remains closed after the hay is added. The structure will need to be secured first so that the chinchilla does not get hurt.
The best option for feeding hay to a rodent
Stone for chinchilla
It will be needed so that the rodent can periodically sharpen its teeth with its help. Typically, a salt or mineral stone is used for these purposes, which is placed in the same way as a drinking bowl, on the walls of the cells. Otherwise, it may get lost, but it will always be in sight and freely accessible to the pet.
Mineral stone for grinding teeth
Litter tray
Of course, you will need to organize a toilet in the cage, since the chinchilla is a fairly clean animal. Although it was previously mentioned about the need for a pull-out tray under the cage, it is also better to install the tray inside the cage or display case. This will make cleaning much easier and more convenient. Plus, the cage won’t get too dirty or clogged.
For more convenient cleaning and keeping the cage clean, install a chinchilla tray
Sand bath
We have already focused on the cleanliness of chinchillas. In order for them to keep their fur clean, they will need clean sand, as it is preferable to water for animals
A small container is enough, but it should be comfortable for the animal to roll over in it.
Rodent prefers sand baths
Toys
They can be called a sign of a good, caring owner. Moreover, some of them do not have to be purchased at a pet store. What entertainment is suitable for restless rodents?
- Running wheel.
It is better to purchase products made of plastic rather than metal, since such toys are unsafe for chinchillas. A place for active running is installed on the wall of the cage. Wheel for active entertainment - Small tunnels made of plastic.
Pets will be happy with this entertainment. The more interesting the pipe maze, the more interesting it will be for the animal to explore it. - Wooden Toys. In addition to games, the animal will be able to gnaw on it without harm to health.
We recommend hanging a hammock in a cage as a toy and at the same time a place to relax.
Tips for making hammocks
Fans of decorative rats who have already made appropriate accessories for them with their own hands are advised to pay attention to the following nuances:
- The hammock should be quite spacious, approximately twice the size of the animal.
- It should be as harmless as possible, pleasant to the touch and have a neutral odor. The fabric should be soft. It is unacceptable to use metal mesh for rat hammocks. Even though a rat may chew on a fabric hammock, it is better to make it a new one. Metal is too dangerous to be injured, besides, it is hard and cold to the touch. The animal may simply find it unpleasant to be in it, and it will stop climbing into such a hammock.
- The hammock must be securely fastened. If your rat is large, it is advisable to hang it not on strings, but on hooks or carabiners. They can be purchased at specialized hardware stores. Some craftsmen use metal chains instead of ties, but there have been cases when rats got entangled in them and injured their paws.
Of course, hammocks, like houses and other accessories located in cages, should always be clean. This will help prevent the occurrence of many dangerous and unpleasant diseases of your pet.
Fort
This is an interesting and cheap homemade toy for rats that will awaken your pets' burrowing instincts. It will also come in handy as a distraction for your rodents from destroying your furniture and other home furnishings.
- Take a big box.
- Seal all flaps and cut two or three rat exits at each end of the box.
- Fill a box with paper towels, newspaper, scraps of fabric, pieces of cardboard, old towels, etc.
- Hide a few treats in the box to pique your pets' interest.
- Bring the rats to the box.
Your rodents will enjoy breaking through the fort, chewing new exit holes, moving packing material, finding hidden treats, etc.
The simplest toys for rats
Rats are smart creatures, but they still love simple toys (at least they will keep them busy for a while). It simply doesn’t get any simpler than the following rat toys:
- Towel labyrinth. Throw a towel (bedspread, sheet, blanket, etc.) on top of the rats and wrap them in it. Watch your pets look for a way out. It is better to use old towels for this, because rodents can make holes in them.
- Sewer pipes. Buy flexible PVC pipes or hoses and plastic sewer pipes. Connect all this together so that it looks like a labyrinth.
- Stone. Place a large, beautiful stone in your pet's cage. Rats will sniff it, climb on it, pee or dig under it. In general, the cobblestones will keep them busy for a while. In addition, rodents will wear down their sharp claws on the hard surface of the stone.
- Basket of dirty laundry. Throw your rats in a hamper full of dirty laundry. They will prowl, sniff and squirm, gradually making their way to the bottom of the basket. Just don't leave them there for too long or they'll chew on something for you.
- Ping pong balls. Throw ping pong balls (table tennis) into the rat cage. They are large enough that rats cannot bite through them, so your pets will chase the balls from corner to corner, periodically driving them into the feeder or house.
- Newspaper. Fold old newspapers into a hut and roll some newspapers into tubes, hiding treats between the layers of paper. Let your rats have a new toy.
- Kitchen Cabinet. Remove all items and substances that are dangerous to rats from the kitchen cabinet. Place your pets in the prepared closet and observe. Believe me, your tailed rodents have never encountered such an abundance of new delicious smells at once. There are so many new things to explore, but it’s better not to leave them there unattended.
- Box of paper napkins. Place a box full of tissues in the rat cage. Pull out some napkins and give them to the rats to show them what you can do with them. They will hide them in their house and come back for more again and again. Stand back and watch the process. It won’t take you much time, the rats will quickly hide all the napkins and they will have an empty box, ideal for a new house.
- Lattice. Use any old scraps of chicken wire or grating, both metal and plastic items will be useful. Place the grilles against the wall and secure them with thumbtacks, nails or string. So you should have a home miniature climbing wall where your rats can practice climbing the bars. As an additional bonus for the most active pets, you can provide them with a new area for exploration at the end of the journey, for example, a window sill.
DIY rat masterpiece
After the drawing, preparation of the workplace begins. You can make a frame by bending the mesh or cutting out parts for fastening. The work stand will be a flat, hard surface protected from damage.
Making a metal masterpiece for a rat includes the following steps:
- When bending the cage, the drawing is performed as a single development. The parts are cut out with scissors and the folds are marked.
- You can bend the mesh evenly in the following way. The material must be placed on the edge of a hard surface, pressed with a board and hit with a hammer several times along the marked fold line.
- Other parts for assembly are cut out with scissors according to the drawing, and the edges are filed with a file so that the rats do not get hurt.
- The roof and walls are connected with pieces of wire 40-50 mm long. To do this, the wire is joined in half, fastening the two parts, and the ends are wrapped around the connected rods. The protruding ends are pressed with pliers and sharpened with a file.
- Holes for doors in the shape of squares are cut out in the walls (on the roof and floors).
- Doors and shelves are made from separate pieces and attached to the walls with flexible wire. For variety, you can put ladders between floors;
- Door locks are made from a bent piece of wire, a metal plate or a clamp.
Door lock made from a paper clip
The frame of a large cage can be strengthened with a metal corner profile, and holes can be drilled in its walls to attach the mesh to bolts or wire. Such a frame can easily withstand heavy weight.
After the frame comes the turn of the pallet. Its dimensions are checked twice to eliminate errors. For manufacturing you will need a PVC sheet 4-5 mm thick. The base is cut from the sheet, slightly larger than the frame, and the edges are 100-150 mm high. The sides are glued to the base and secured at the corners, and the joints are coated with silicone.
Choosing material for a homemade hammock
When creating a rat bed, you first need to decide on the base. Cotton fabric or thin denim are perfect for this product. If the room where the rat lives is quite cool, you should think about an insulated cradle, for example, made of fleece or flannel.
A rat hammock can also be knitted. The ideal option is yarn that consists of 50-100% cotton or viscose. A budget bed can be made from iris - yarn in small skeins of various shades. A hammock made from floss threads will also please your pet.
You can also use unnecessary pieces of fabric and old clothes. The material for the bed does not have to be new, the main thing is clean and intact.
How to do
In the photo of accessories for ferrets you can see a variety of hammocks: from classic wicker ones to multi-level “houses”. The simplest product requires only 2 flaps, which are sewn from the inside out on three sides. Then the workpiece is turned out and the fourth side is hemmed. For the “winter” version, a warm lining is placed in the middle. All that remains is to sew on the ribbons or loops (for carabiners), and the hammock is ready!
It is also easy to make a hammock in the form of a pipe or pocket with your own hands. To do this, you will need rectangular flaps, which are stitched in the above manner, and then folded and stitched along the length, forming a “pipe”. Ribbons are sewn on both ends of the pipe. For a hammock pocket, a rectangular piece is sewn together like a duvet cover with a hole in the center.
- a piece of fabric one and a half times larger than the actual size of your pet
- scissors
- 4 nails
- hammer
- chair on 4 legs
- rope or strong thread.
Instructions for making a hammock for a ferret with your own hands:
- Prepare a piece of fabric and a chair. Using scissors, make a hole in the fabric of such diameter as to thread the rope through.
- Thread a rope or thread. Tie a strong knot.
- Drive the nails at the same height. 1 nail for each chair leg.
- Attach the hammock to the chair using knots. The knots should be located along the line of the nails.
The ferret hammock is ready. Let's hope that your pet will like this structure.
Using a similar technology, you can make a hammock for a chinchilla, for a rat, for a guinea pig, for a degu with your own hands.
Detailed master class on making a hammock for a cat with your own hands. Due to the fact that the cat family is not particularly compact, a hammock for them will look more cumbersome than for small rodents.
- plastic sewer pipes, radius 1 cm, approximate length – 30/40 cm – 8 pcs.
- g – shaped fasteners for pipes – 4 pcs.
- stationery knife
- textile.
Step-by-step instructions for making a hammock:
- Prepare the fabric by cutting small holes in it along the edges. The size of the product depends on the parameters of your animal.
- Having measured the required size of the pipes, cut them so that 4 are the legs of the same length, and the remaining 4 are the base of the hammock. As a rule, you cut the base into a rectangular shape so that the cat can comfortably sit on its bed.
- Thread the fabric through the pipes for the base. If the holes are small, then no additional fastening is required.
- Using L-shaped fasteners, connect the pipes.
Read more: Master class: preparing a diet for pigs -
Your DIY cat hammock is ready. Your pet will appreciate this craft as it deserves.
When making hammocks for your animals, do not forget about yourself. Everyone, at least once in their life, has seen a hanging chair - a hammock. Most likely, there is no person who would not like to have this miracle for relaxation. Today, you will learn how to make a hammock in the form of a chair.
- hoop – 2 pcs.
- thick thread
- liquid glue
- rope
- stationery knife.
You will be pleasantly surprised when you get a result that exceeds all your wildest expectations.
Step-by-step master - DIY hammock class:
- Apply liquid glue to the edges of the hoop.
- Wrap the threads around the hoop until you completely cover the surface.
- Do this action with 2 hoops.
- Using a thread, we weave a pattern, stretch the thread according to the pattern of knitting tight knots. When you have completely connected the frame, perform these steps alternately with the second hoop.
- Fasten them together. Check the strength of the product. Attach a rope to hang it on a tree.
Video tutorials on how to make a hammock are widely distributed on the Internet.
Knitted hammock
Those who know at least the basics of crochet can knit a hammock with their own hands. Such a product will be denser and stronger than many options. To make it, take a size 4.5 hook and threads of a suitable size. First you need to knit a 15 by 20 centimeter rectangle using single crochets. Afterwards, it is tied around the edges with single crochets, and ribbons are tied from the four corners with air loops to secure the hammock in the cage. The process of making such a knitted hammock can be seen in the video below. This is a fairly simple and quick option even for novice needlewomen.
DIY sennik
Hay placed in a cage simply in a pile will not benefit the health of the pet - the pigs will eat the product contaminated by themselves. To avoid this, it is worth equipping the animal’s home with a hay barn - a special feeder where grass is placed. This device provides the pig with unhindered access to food, but at the same time eliminates the possibility of it being scattered throughout the house.
Pet stores usually sell cages already equipped with a hay box. There you can also purchase a container for hay separately from the cage. There is an alternative option - you can make a hay barn for guinea pigs with your own hands. This does not require material costs and provides complete freedom of creativity.
You can use boxes and other containers as a hay box; even socks and plush toys will do. And from egg trays, as well as paper napkin and toilet paper rolls, you can make a disposable toy haymaker. By placing grass inside these items and giving them to the pet, the owner will delight the pet with new fun, which also contains a nutritional surprise.
A simple haybox made from plastic containers
You can turn a simple plastic container box into a hay feeder. However, any other plastic container will do. The container is secured to the bars of the cage using paper clips. The fastenings should be made higher - this will protect the animals from getting wounds and damage. That's all - the hay barn for the pig is ready. All that remains is to fill it with grass. And of course, we must not forget to add fresh product to this homemade feeder in time.
How to sew a hay bag
To make a hay bag you need:
- Take two pieces of fabric measuring 20x30 cm each.
- Place them right side together.
- Draw two circles on one side in the center (there should be a gap between them).
- Cut out the drawn circles on one piece of fabric to create two windows.
- Finish the edges of the cut out windows with a stitch.
- Sew pieces of fabric along the bottom and side edges, leaving the top edges unsewn.
- Fold in the top edges of the product and finish (stitch) them.
- Turn the product inside out.
- Sew 4 ropes to the upper edges of the resulting bag - two on one and two on the other. Using these ties, the bag will be attached to the bars of the cage.
All is ready. All that remains is to fill the hay bag with food and place the feeder in the pig’s house.
Sennik out of the box
You can make a hay box for a guinea pig from a shoe box or cardboard packaging from small household appliances. Any cardboard boxes will do, the main thing is that they match the dimensions of the animal’s house - the feeder should not fill the entire space of the home. The top and one long side are removed. When removing the side, you should leave 5 mm of cardboard around the edges. 4 holes are pierced on both narrow sides. A wire or fishing line is pulled through them, through which the hay is attached to the bars of the cage. The feeder is ready - you just need to place the product in it.
In the form of a pipe
A very popular option. To make such a model you will need thick fabric. Cut out 2 rectangles of the same size. We fold the edges of the rectangles, align them and stitch them.
Next we sew the 2 long side parts together. You will get something like a tube, turn it so that the seam is on top, and make a round cutout. It must be processed using a thin cloth. 2 belts can be used as holders; they are sewn to the fabric and attached to the cage.
It is possible to slightly supplement such a pipe. To do this, take a rectangular fabric, take the sizes a little smaller. We fold the rectangle and stitch it on one side, then we connect the part on one side of the pipe. An additional pocket comes out; it is secured at the corners with the help of paper clips and to the cage.
Necessary materials
Once the construction of the guinea pig house is finished, you can begin to equip it inside to make it softer, warmer and more comfortable for the animals. Whatever the material is chosen for, for a hammock or for a crib, you should choose only absorbent fabric, since guinea pigs do not use trays, as rabbits can do, for example.
You can use recycled shredded paper, wood shavings, or paper towels to make your cage cozier.
The important thing to remember here is to avoid any wood shavings that may have high levels of essential oils or preservatives, as these may be toxic to pets
Using layered towels or wool can be more effective because the material can be washed and reused. You can get creative and use colors and designs to create a separate little palace for your guinea pigs in the cage. This is the place where they will sleep and hide.
- Multilayer and dense corrugated cardboard,
- Metal mesh or lattice with a mesh no larger than three centimeters,
- Ordinary plastic cable ties,
- Knife,
- Scotch tape,
- Large and small scissors
- Pencils or markers for marking,
- Ruler.
To ensure that the cardboard does not allow moisture to pass through, it must be glued on the inside with tape in two or three layers. Some people prefer to cover the inside with acrylic or even fiberglass. Cardboard is an ideal material - it is light, easy to work with, odorless and harmless, and also easy to find.
After a new and spacious house for a guinea pig is ready, it must be equipped with everything necessary for a comfortable and happy life for the animal. The first thing you need is feeders. It is necessary to have a separate feeder for hay or grass, as well as for dry and succulent food. If there are several pets, then there should be several feeders so that the animals do not compete and fight for food. There should also be several drinking bowls.
You can also make your own drinking bowl and feeder. A bent and fastened metal mesh is a good substitute for a hay manger, and a drinking bowl can easily be made from an inverted plastic bottle. To do this, a hole is punched in the bottle cap into which a regular drinking straw is inserted. The liquid will not spill if the hole diameter is slightly smaller than the diameter of the tube.
You can make a house with your own hands from plywood or durable cardboard, or you can buy a ready-made version in a store.
We suggest you read: How to make a house for a rabbit with your own hands
As houses, some breeders use clay flower pots, cardboard boxes, and even wooden bird cages from which the bars are removed. There are quite a lot of options. If the cage is multi-level, several ladders should be installed. They are made from lattice or wood. You can also set up a play area for pigs and place a small labyrinth, several toys, balls or a comfortable hammock there.
Prepare the necessary materials and tools:
- ruler;
- stationery knife;
- small and large scissors;
- markers and pencils for marking;
- plastic clamps;
- scotch;
- metal grid with a cell size of up to 3 cm;
- thick cardboard.
It is recommended to install a plastic tray at the bottom of the structure, which will facilitate the cleaning process and protect the animals from drafts. An alternative option is a pallet made of 8 mm plywood; for this, use the base drawing. The ends of the walls and bottom are glued together with toxic-safe glue. You can also make a pallet from polycarbonate by connecting the structural elements with building corners.
Requirements for a rookery
The hammock should be such that it can be easily installed where the cat likes to bask. There should be no clothing or other items near this place from which it is difficult to remove hair. Rodent models are usually placed in cages.
It is worth paying attention to the strength of the frame. Not every base will support a Maine Coon or just a heavy cat.
A lightweight frame is also suitable for a chinchilla or rat. When attaching it to the battery, you need to take into account that under heavy weight it can come off along with the cat and the hammock. For a heavy animal, the bed is made on the basis of a durable but light frame, for example, aluminum.
It is important how the product will be attached to the battery or other object. It is fixed to an old-style sectional radiator using bent hooks
If the heating element consists of plates, it is better to use special rectangular fasteners for installation. A do-it-yourself hammock for a cat is attached to the battery on the top or side. How exactly depends on the preferences of the pet.
The next point that cannot be ignored is the fabric that serves as the cover. Cats do not like synthetic fabrics, no matter how slippery or fluffy they are. Suitable material with the following characteristics:
- dense;
- lasting;
- abrasion resistant;
- elastic;
- Machine washable.
All these factors must be taken into account both when purchasing and when making a hammock. It is worth thinking about where the product will be located in advance. If there are several heaters in the apartment, you should observe which one the animal prefers.
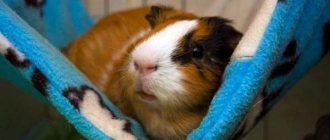
for guinea pig
A straight hammock is created exactly like a corner one, the difference is that for this model the piece of fabric must be square.
If you want to make a hammock from filler, then you will need a piece of fabric 30x60cm. We fold it in two with the front side facing inward. It turns out that one side is solid, and we will have to sew the other three. To increase the strength of the seam, you should imitate machine stitching, but you can also use any other seam that is more or less successful. Having finished sewing both sides, we turn the future hammock inside out, thereby hiding the seams. Next, we arrange the foam rubber inside the product, straightening it well. Instead of foam rubber, you can use other fillers, but you should remember that guinea pigs will sooner or later stain the hammock and it will need to be cleaned and washed periodically. Therefore, it is necessary to select a filler taking into account these factors. Next we sew up the third side of the product.
When the base of the hammock is ready, we proceed to sewing the ties. Next we use the laces. They are folded into two and the middle of each lace is sewn to one of the sides of the hammock. Once sewing is complete, you should have a hammock and eight string ties. The entire process of creating a homemade hammock is over.
You can also use regular paper clips instead of laces. To do this, a small hole is made in each corner of the hammock and sewn with threads to strengthen it so that the hammock does not tear during the game.
Hammock suspension
At what height should the hammock be installed? Should it be tightened or should it sag? Focus on your pet. Hang the hammock so that the pig can climb on it without much effort, and then experimentally select the desired height and sagging of the hammock. Under no circumstances should you try to put your pig in a hammock yourself; it may get scared; let it climb into it on its own over time. And to speed up this process, you can add your pet’s favorite treats to the hammock.
Video on how to sew a hammock for guinea pigs:
Why do you need a hammock?
Pet rats need a comfortable place to sleep and rest. A hammock is perfect as a sleeping place for a pet. However, many rodents also use this item as a place to play. It's no secret that rats enjoy jumping, crawling on ropes and climbing to high places. A hammock can be considered an additional attribute in a play cage. Since you need to climb on it and you can sway slightly.
If we compare a hammock with other methods of organizing a sleeping place, it has its own advantages and disadvantages. The advantages include saving space on the floor, since the hammock is suspended at some distance from it.
If we talk about the disadvantages, it is worth noting that not all rats will like such a sleeping place.
Hammock for chinchillas eating their bed
If an animal chews on a fabric hammock, you should replace it with a hanging bed made of a different material. Suitable for production:
- Hemp rope (the fabric is knitted from it and installed in the cage according to the principle of a regular fabric hammock).
- Wooden planks (they are assembled onto one rope like a bracelet, and the holes should be at both ends, and not in the middle; the result is a tunnel (it is important to make sure that its width corresponds to the dimensions of the animal), which is suspended in a cage like a swing).
How to properly set up a play area for rats
Each rat or mouse cage should also contain various houses, shelters and tunnels in which the animal can hide. Such shelters give the pet a sense of security and allow them to rest peacefully. Building and moving through corridors and tunnels is a game that most rodents are completely captivated by, so you need to make sure that they have such toys in their environment. There are models of labyrinths in the form of pipes that can be easily rebuilt or expanded by adding additional corridors to increase the difficulty of overcoming them.
Did you know? Rats are extremely clean and spend several hours every day grooming themselves and their pack members.
Bypassing such complexes, for example, in search of a hidden delicacy, mobilizes the cell inhabitant for physical and intellectual efforts. Pet rats are often also avid climbers. If your pet shows the ability to climb, it is worth giving him devices that allow him to move vertically or walk along the upper levels of the cage. For these purposes, all types of stairs, bridges, suspended platforms, hammocks and swings will be ideal.
If at least several such devices are installed, your pet will have a real playground. In such a house he will definitely not be bored. Entertaining attractions for rats are easy and simple to make with your own hands. You can involve children in this interesting and fun activity. Plus, most crafts will be free or very cheap, and can be made with minimal time and effort.